Interfaces
Overview
The Interface section of ROI iAM provides predefined interfaces, which are included with the product. These interfaces can be modified, extended, adapted, and enriched.
There are two views available: list view and details view. The list view displays all available interfaces, while the details view allows you to view and edit the details of a selected interface.
Access
To learn more about the necessary access and prerequisite requirements for this section, please review the following documentation: Security
List view
The list view displays all interfaces in the current version or revision. Interfaces can be filtered or searched.

Interfaces have the following properties:
INFO
The presented values for name and identifier are only meant as examples.
- Name - e.g.
core:2.0:Group - Identifier - e.g.
urn:roiable:roiam:interface:http:idm:1.0:EventCallback - Origin - e.g.
SOURCEorTARGET - Status - Can be
EnabledorDisabled - Interface type - Can be
HTTPorRFC - Bound repository types
- Read only - Some interfaces are read-only. This is indicated by an icon next to the interface name.
Creating an interface
To create a new interface:
- Press the Create button, located next to the search and filter buttons.
- Choose the interface type (
HTTPorRFC). - Choose whether the identifier should be automatically generated or manually defined. Using the toggle will change the create dialog based on the selection.
INFO
When using an automatically generated identifier, it will always be prefixed with
urn:roiable:roiam:interface:and include the category, version, and name. The interface identifier can contain up to 255 characters. - Input a Name. - This field is mandatory. The name should start with a capital letter and may include colons, dots, or letters (A–Z, a–z). The name becomes part of the interface identifier.
- Input a Category. - This field is mandatory and can contain up to 25 characters.
- Input a Version. - This field is mandatory. It can include only numbers and dots (e.g.,
1.0or111.111.111). - Click Create to finalize the process.
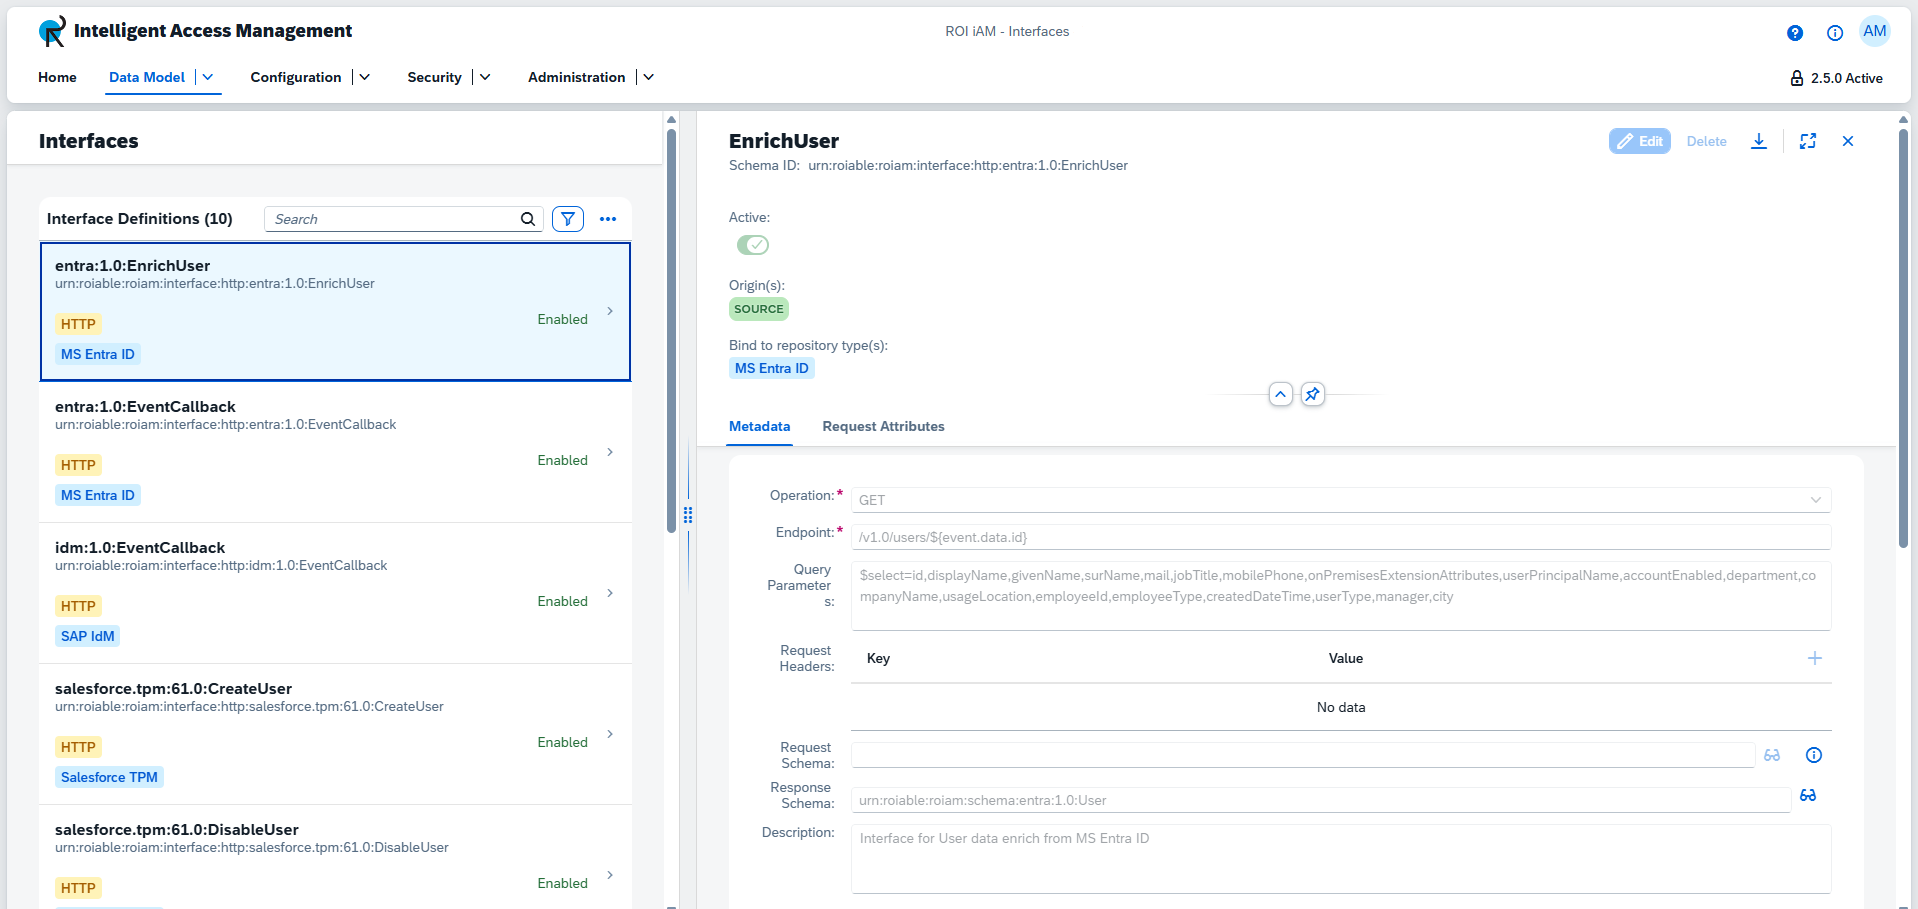
Details view
The details view provides an overview of the interface status, metadata, properties, and attributes. These can also be edited when the interface is not read-only, and when on a non-active version or revision. The name and identifier cannot be modified once the interface is created.
The controls for the details view are located in the upper right corner of the details view. Left to right, we have the following buttons:
- Edit - Enters edit mode, allowing you to modify the interface properties and attributes.
- Delete - Deletes the interface.
- Export - Exports the interface.
Edit mode
- The Active toggle is used to enable or disable the interface.
- Bound repositories can be edited by opening the Repository Types dialog (accessible from the input field) and selecting the applicable repository types. Selected repositories appear as blue tags. There is no limit to the number of selections.
Metadata
- Operation - Defines the operation the interface performs. This field is mandatory to enable the interface.
- Endpoint - Specifies the endpoint of the interface. This field is mandatory to enable the interface.
- Query Parameters - Allows you to add additional query parameters, which will be used with the interface.
- Request Headers - Consist of key-value pairs. To add a new header, click Add. Use the Delete button next to a key–value pair to remove it.
- Request Schema and Response Schema - Can link to schemas defined in the Schemas section. Start typing the name or identifier of the desired schema to select it from the suggestion dropdown.
- Description - Can be modified by entering text in the description field. This field cannot be left empty.
Attributes
Attributes can be added, modified, and deleted.
Each attribute has the following properties:
- Name
- Key - Indicates whether this is a key attribute.
- Type - Available types include: string, boolean, decimal, integer, dateTime, reference, binary, and complex.
- Default Value
- Required - Indicates whether the attribute is mandatory.
- Multi-Valued - When enabled, the attribute can hold multiple values.
- Description
To create a new Attribute
- Click Add to open the creation dialog.
- Enter a Name – This field is mandatory. Attribute names are case-sensitive and must match the original attribute name.
- Select a Parent attribute (if applicable). Only attributes of type complex can serve as parent attributes.
- Select the Type – This field is mandatory.
- When all required fields are completed, click Add.
After clicking Add, the new attribute appears in the Attribute Definitions table.
To edit an attribute
- Click Edit next to the attribute.
- Apply the desired changes.
- Click OK to confirm.
INFO
An attribute name can be changed immediately after creation and before saving the interface using the Save button.
TIP
To delete an attribute, click Delete next to the attribute.
All changes are saved only after clicking the Save button in the upper-right corner of the details view. Closing the details view or pressing Cancel exits edit mode and discards any unsaved changes.