Entra Installation and Configuration
This section covers the creation of Enterprise Applications, Catalogs, and Security Groups in Microsoft Entra. These components are required each time a new repository is onboarded from ROI iAM.
Enterprise Application
An Enterprise Application in Microsoft Entra represents a repository in SAP IdM, serving as the connection point for application roles, catalogs, user accounts, and assignments.
Steps to Create an Enterprise Application
- Navigate to Entra Admin Center → Identity → Applications → Enterprise Applications.
- Click + New application → Create your own application → Integrate any other application.
- Choose a name based on your internal naming convention.
- After creation, note the following:
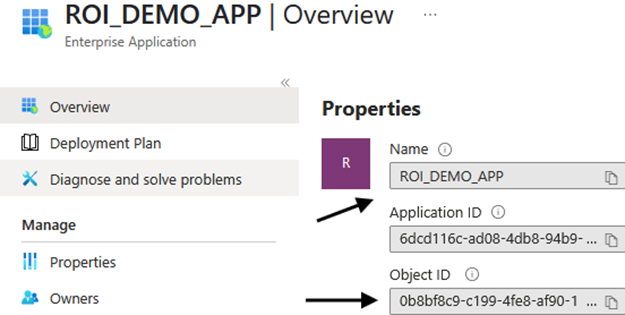
- Go to the newly created app → Overview → Properties → Copy the Object ID and Name.
- Navigate to Identity → Applications → App registrations → Open the newly created application → Overview → Copy the Application Registration Object ID and save it for Azure Tables.
Remove Default Application Roles
Each new application includes two default application roles that are not needed. To delete them:
- Go to the App roles menu in the App registration.
- Open each default role and disable it:
- Uncheck "Do you want to enable this app role?"
- Enter a temporary value (e.g.,
Test) → Click Apply.
- Reopen the same role → Click Delete → Apply.
- Repeat for both roles.
Reminder
Save the following properties for later use:
- Enterprise Application Name
- Enterprise Application Object ID
- Application Registration Object ID
Catalog
A catalog organizes access packages and links them to an Enterprise Application.
Steps to Create a Catalog
- Navigate to MS Entra → Identity Governance → Access packages → Catalogs → + New catalog.
- Name the catalog to match the Enterprise Application name.
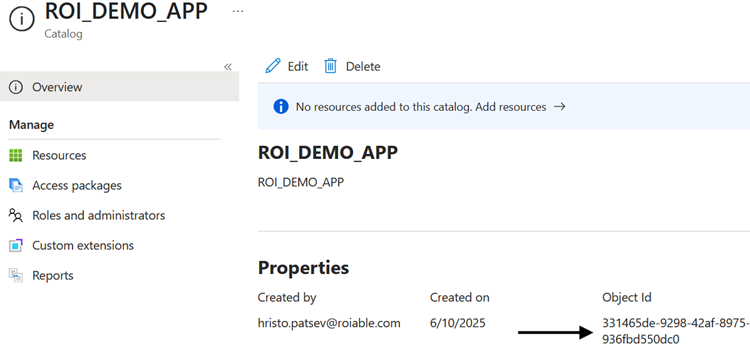
- After creation, note the catalog's Object ID:
- Open the catalog → Overview → Properties → Copy the Object ID.

Add Enterprise Application as Resource
- Go to Resources → + Add resources → Applications.
- Select the previously created Enterprise Application.
Reminder
Save the Catalog Object ID for later use.
Catalog Custom Extension
Prerequisites
Complete the Azure configuration before proceeding. You need the Logic Apps to be created first.
A custom extension must be attached to the catalog to enable provisioning triggers.
Steps to Add a Custom Extension
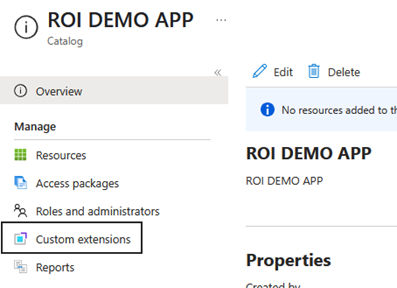
- Open the catalog created above and select Custom extension.
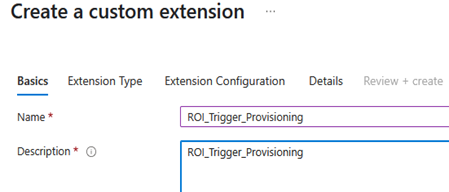
- Enter the name:
ROI_Trigger_Provisioning.
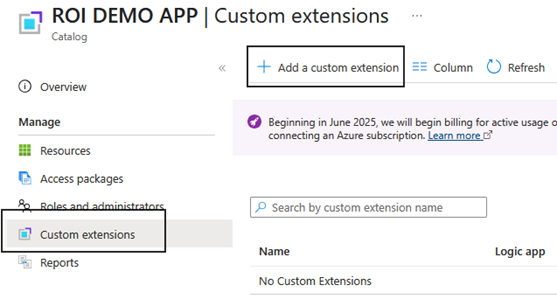
- Provide a description.
- Click Next and leave the Extension Type and Extension Configuration tabs unchanged.
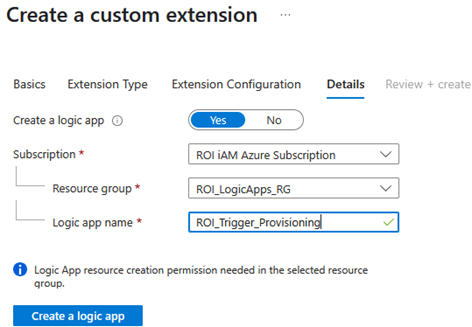
- In the Details section:
- Select your Subscription.
- Choose the Resource group:
ROI_LogicApp_RG. - Enter the name:
ROI_Trigger_Provisioning. - Click Create a logic app → Create to finalize.
Reusing the Logic App
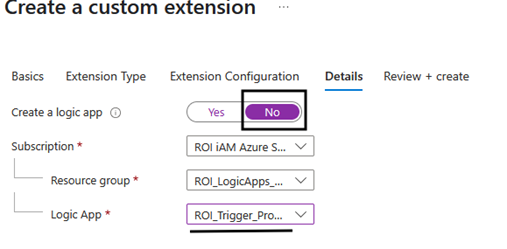
- Once the
ROI_Trigger_ProvisioningLogic App is created, you can select it as a custom extension for each new application you onboard. - You do not need to recreate the Logic App for each application.
- When onboarding additional applications, add a custom extension as usual.
- When you reach the Details step, select NO for "Create a Logic App".
- This approach allows you to reuse the existing Provisioning Logic App instead of creating a new one each time.
Security Group (Accounts)
Security groups in Entra replace the ONLY privilege in SAP IdM, indicating whether a user has an account in the application linked to the security group.
Steps to Create a Security Group
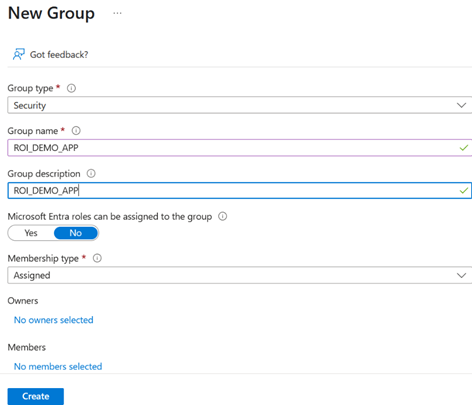
- Navigate to Entra → Groups → New group.
- Set the following:
- Name: Same as the Enterprise App and Catalog name.
- Type: Security.
- Membership Type: Assigned.
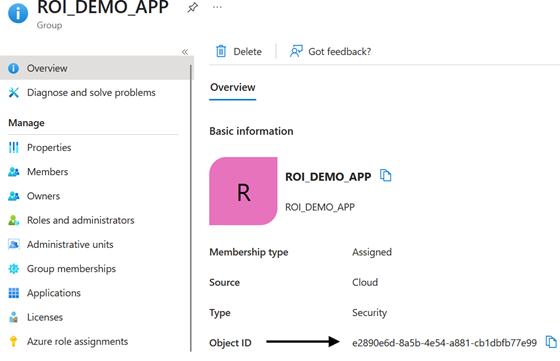
- After creation, note the Object ID:
- Open the group → Overview → Properties → Copy the Object ID.

Reminder
Save the following properties:
- Security Group Name
- Security Group Object ID
Next Steps
Now that you have configured the Entra components, continue to Azure Configuration to set up the Azure resources including Storage Accounts, Key Vaults, and Functions.